Over the past few weeks we’ve picked up some new programs and art compilations to increase the range and quality of our designs.  Graphic design can unfortunately be limited by the tools on hand so each additional plug in, application, program, extension, tutorial, or clipart pack can make a big impact on the final artwork you’re outputting.


Here is a list of the most recent things we’ve picked up:


CorelDraw.

When we were first getting into the t-shirt game, we designed exclusively on raster-based programs like Photoshop and Paint.Net.  In all honestly, it can be done that way.  However, vector programs like Adobe Illustrator and CorelDraw provide a lot of awesome functionality that you just can’t get with Photoshop or Photo Paint.  Upgrading to vector art is challenging, because the whole language is completely different than PS.  Once you get the hang of it, though, it’s amazing how much more you can do with your designs.


Fashion Factory – CorelDraw Plug-in.

Fashion Factory is awesome.  I have to thank our colleague, Jeanette from The Pondering Pooch, for recommending it and my partner Steve for making the decision to get it.  It’s a plug-in that quickly adds textures and effects to artwork.  Like, really quickly.  In just a few easy clicks you can add a distressed, grunge look to any design.  There is also an extensive list of vector-based, scalable, color-changeable t-shirts that allow you to make really slick mock-ups for customers.  Definitely a helpful plug-in, and worth every penny.


800 CorelDraw Brushes.

Working with vector programs allows you to use and create custom brushes.  This can be anything from the simple – drawing a line and applying a brush that converts the line into a realistic paint brush stroke – to something far more elaborate – drawing a line and applying a brush that converts the line into a highly detailed, realistic chain.  Or carved stone.  Or lightning, tribal designs, feathers, patterns…anything!  With brushes, if you can draw a line, you can create some visually stunning graphics.


T-Shirt Clipart.

This one is very simple.  Have a design in mind that requires a skull?  Oh.  *click click*  Here’s 37 of them.  What’s that?  You need a tribal effect for the background?  Boom – how about one of these 41 tribals?  There’s a lot of amazing, high quality, hand-drawn art in this pack.


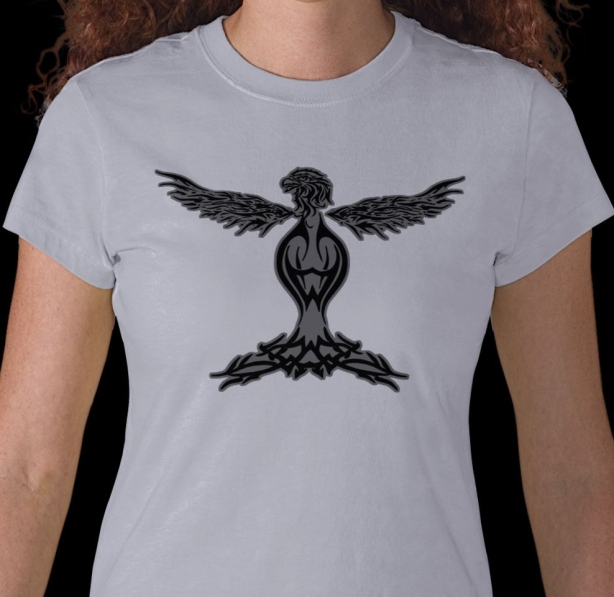
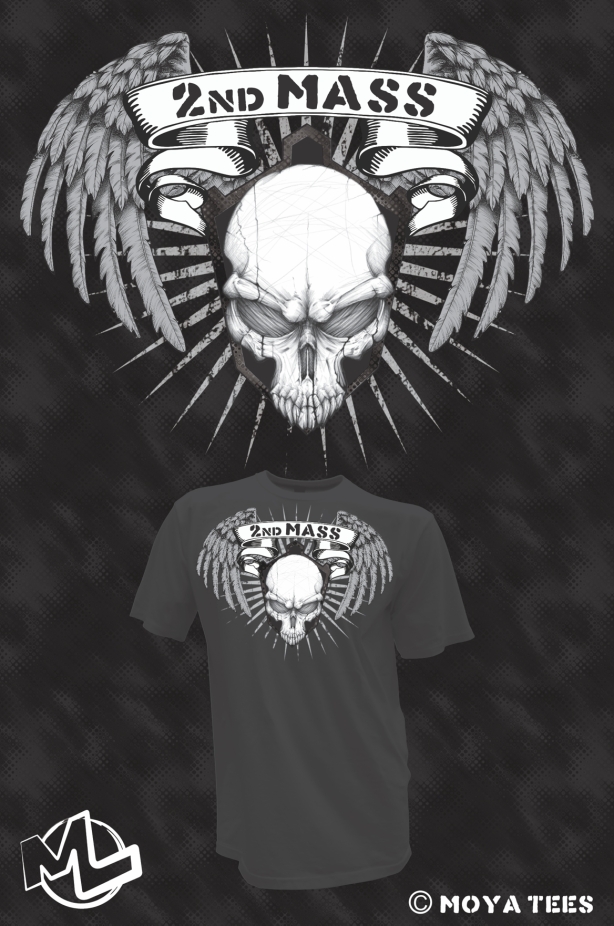
Now this is a little embarrassing, but I feel like showing this will really drive home the importance of these tools.  I’m going to post two pictures here.  The first is a design that I created four years ago using Paint.NET, when we first started.  The second is a design I worked up yesterday using the tools listed above.  There is, shall we say, a noticeable difference.


To coincide with the development of our new logo and the addition of our brand-spankin’-new conveyor dryer, we wanted to pick up some new products with which to experiment.  As I’ve mentioned before, we believe it is important for screen printers to challenge themselves – to learn new techniques and styles.

In the spirit of self-challenging, we ordered some discharge ink earlier this month.  Although we had the opportunity to print with discharge at Ryonet’s Los Angeles location, we have yet to utilize it in our own shop.  The addition of Gilligan (our new Little Buddy conveyor dryer) seemed like a great time to step up to a new and exciting challenge.  We are currently making preparations for our first run of discharge prints next week.

We also picked up some Ryonet WBP Hybrid Emulsion for Water Based & PlastisolWhen we first started printing we used CCI DXP (Pink) Diazo-Photopolymer Dual Cure Direct Emulsion, which works very well.  However, its primary function is for plastisol ink and breaks down too quickly when used with water-based inks.  When we began using the water-based ink we switched to SWR-3 water-resistant emulsion.  This also worked well, but is no longer available through Ryonet.  Good thing, too.  Otherwise we probably wouldn’t have tried the WBP Hybrid emulsion which, as the title of this post suggests, is the best emulsion ever.  At least of the three we’ve used.

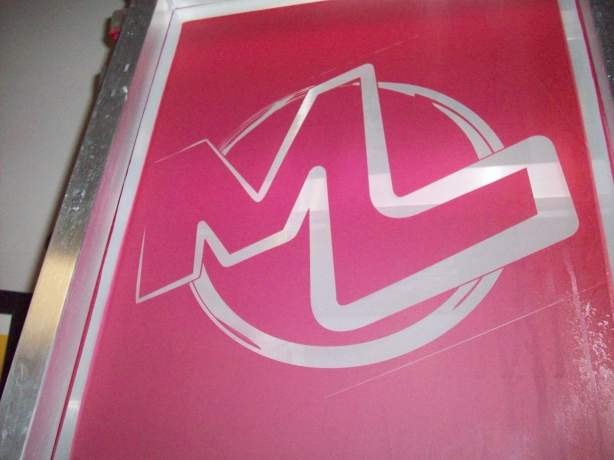
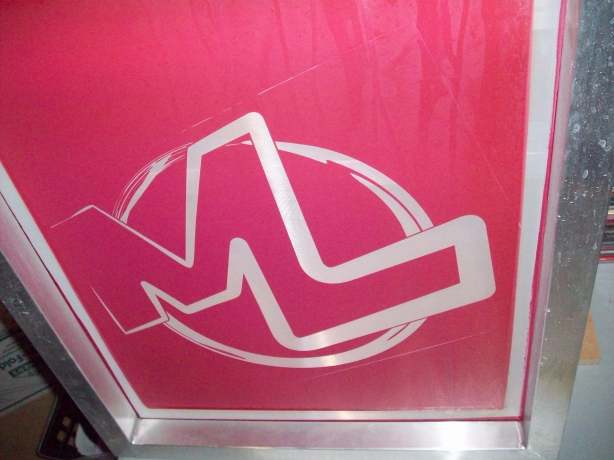
WBP has a vibrant red color that is helpful during the washout, printing, and cleanup stages.  It coats the screen beautifully, dries quickly, and washes out like a dream.  The website claims that WBP is easier to use AND reclaim than SWR-3.  That’s an understatement!  This stuff is amazing, and I highly recommend that every printer at least tries a quart.  Also, the cost ($27.99 for a quart) is the same as the cost of standard DXP emulsion.  Can’t beat that.

Here are a few quick shots of an exposed screen, coated with WBP.

I spent the majority of today re-re-(re, in some cases)-watching a few training DVDs from our Ryonet collection.  There are so many awesome techniques and various printing styles discussed in these videos – it never fails to give me ideas for new things to try.

My inspiration today came from one of my favorites – The Advanced Screen Printing and Special Effects DVD featuring Graphic Elephants.  There is a ton of cutting-edge instruction in this DVD.  If you’re looking for something to spark your creativity, impress your customers, or bring a new edge to your line, pick this up immediately.

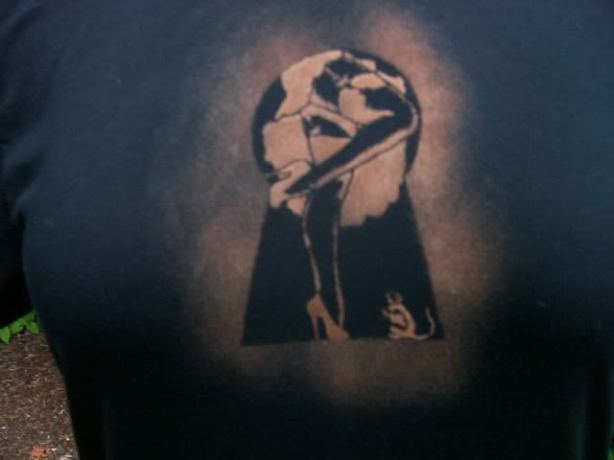
What I saw today that I can’t wait to try is very different than anything we’ve done before.  It involves printing black ink on a black shirt, then mixing up a watered-down clear discharge ink and applying it to the shirt with a paint sprayer.  The discharge colors the shirt in a really unique way, but the previously printed black ink remains untouched.  The result is a really cool look, and each shirt is distinctive.  I’ve searched for example pictures of this technique and found very few.  This is similar to what I’m talking about, though less impressive.

I will soon be working on a logo design with this process in mind, and testing it out.  I’m sure there will be pictures after I can get everything together.  Stay tuned!

Success is difficult to define because it’s such a subjective concept.  We all have different goals, after all.  We’ve compiled a list here of some tips (or challenges, sub-goals, focus directives…whatever you’d like to call them) that we’ve found helpful in the industry.

Be Aggressive.

In screenprinting, as in most industries, customers rarely come to you.  You have to go get them.  It’s not always enough for potential customers to know who you are and what you do, you need to reach out and offer your services.

Educate Your Clients.

To most non-printers, screenprinting is shrouded in mystery.  Keep your customers in the loop about how their order will be fulfilled.  Showing them what goes into the process will not only impress them, but add value to your services in their eyes.  This will solidify your image as a professional and increase the odds of repeat business.

Be Frugal…to a Point.

Pinching pennies is sound financial advice, unless it begins to affect the quality of your product, ultimately causing you to lose out on jobs.  It’s not the case with everything but, I’ve learned that in this industry you get what you pay for in most instances.  Get the best equipment and supplies you can afford.  Every upgrade provides extra capabilities and the more jobs you can get done, the less you’ll have to turn down.

Provide Examples.

You’ve just landed a contract for 150 t-shirts – basic black ink on white shirts – for a local company wanting to promote itself.  It’s a little extra work but, throw in a surprise sample of something else you can do.  Take their logo and print it on a single tote bag, or swap out the black ink for multi-color, and print an extra t-shirt.  This is a great way to show the customer some other options that might spark additional ideas.  If they see the slick tote bag you’ve printed for them and somewhere down the road decide they’d like some, guess who’s going to get that business?  You!

Respect Your Time.

It’s a bit of a cliché but, if you don’t respect your own time, you can’t expect anyone else to either.  Time is money.  Charge accordingly.

Embrace the Screenprinting Community.

There are two very different approaches one can take in regards to colleagues.  The first is to view anyone in the same field as a competitor.  The second is to view them as knowledgeable resources and potential affiliates.  I’ve met many talented screenprinters and decorators since we started, and they have provided a great wealth of information and support.  In addition to this benefit, there is also potential for cross-recommendations.  If, for instance, you specialize in heat transfers and know of another printer that does embroidery, make a deal.  Send all of the embroidery jobs you get their way, and ask that they return the favor for jobs they may not be able to handle.  It’s a wonderful extension of word-of-mouth advertising, and customers will be happy you got the job done- one way or another!

Make a Profit.

Obviously, right?  What I mean is, be sure to charge enough for your services so that your final profit is worth the effort.  Screenprinting is a competitive industry and, especially as a newbie, there is a desire to undercut other printers to land a job.  I’ve learned the hard way that there are certain aspects of screenprinting price sheets that are in place for a reason.  For example, minimum orders.  When we first started out, it boggled my mind that printers would only take a job if you ordered at least 10 shirts.  I did about seven single-shirt orders before it occurred to me, “Hey, I’m losing money on these!”  Yes, some small orders can (and will!) lead to other, larger jobs – that’s true.  However in business, you have to draw the line when you start losing money.  Do some research as to what the other (possibly more experienced) printers in your area charge, and try to stay close to their prices.

Expand Your Knowledge.

There are many different methods and techniques in this industry for decorating apparel and other products.  The more of these you learn, the wider variety of services you’ll be able to offer prospective customers.  This will give you freedom to potentially handle every job that comes your way, as well as offering the profitable “upsell.”  Take classes, read blogs, and watch tutorial videos.  There is a wealth of information out there.  Challenge yourself to learn and experiment with new things, or even innovate new styles.

Find a Good Supplier.

This is an important tip for both the financial and the quality end of your business.  A reliable, informed, and helpful supplier is crucial to helping you meet your clients’ needs and maximizing profits.  Ryonet is a perfect example.  Not only are their prices competitive, but they excel in the additional intangibles that can help you succeed: training, support, and customer service.

Keep Your Business Plan Flexible.

A business plan is much like a road map to your goal.  It states your specific destination, and the route you plan to take.  This is good as a guide, but as sometimes happens on the road, you can run into obstacles along the way.  When you hit an unexpected detour, be flexible, reroute, and start in a new direction.  It’s not the end of the world.  It’s important to view your business plan as a guideline, not the end-all-be-all.  The number of paths to your goal is only limited by your imagination.
We recently finished up an order of promotional shirts for an upcoming documentary film called The Activist Within.  What a fun job!  In fact, we had such a good time printing the shirts that we put together a short video montage of the process.

The shirts were basic unisex black tees with a rainbow blend print on the front, and a two-color image on the back.  Because the substrate was black, we used a white underbase layer for the rainbow blend.  Ryopaque high-opacity ink was used, and remains our favorite plastisol.

Check out the video and visit www.theactivistwithin.com for information on the film.

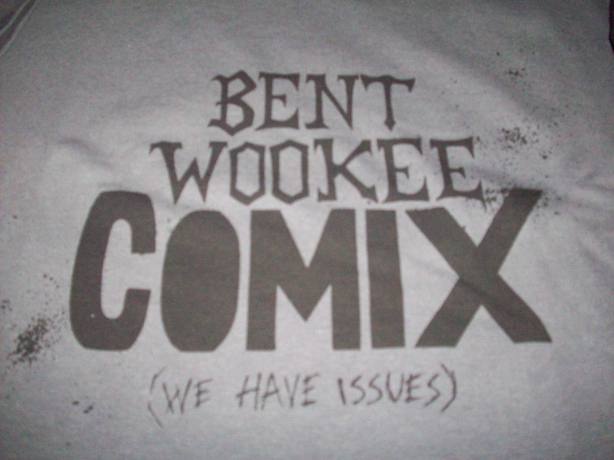
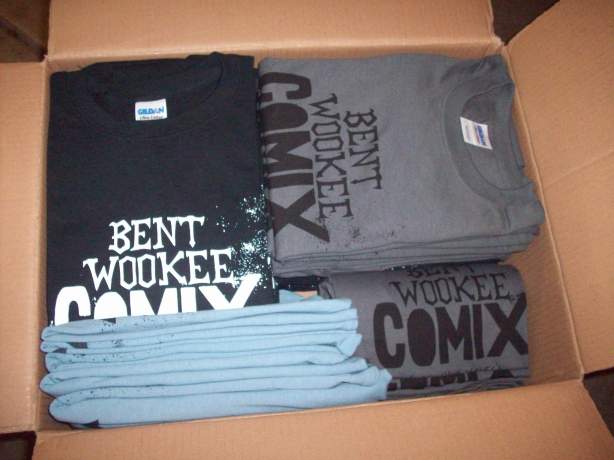
Just wanted to post this quickly and share the fun little montage video we made of one of our most recent runs for Bent Wookee Comix of Johnstown, PA.  It was a 40-shirt job that consisted of two different colored shirts – stone blue and charcoal – with black water-based ink, and black shirts with white plastisol.  We also printed a special one-off with glow-in-the-dark ink for the owner that shows up at the end of the video.  Enjoy!  And, if you happen to be in Pennsylvania…stop in and check out the coolest comic store in the universe.  Probably.  I haven’t been to them all, obviously.  I can’t imagine any of them are as cool as Bent Wookee, though.

In the screenprinting industry, it’s incredibly important to find a reliable supplier for not only equipment and supplies but shirts as well.  The suppliers you choose to do business with become, in effect, your partners.  If you fail to meet a deadline because your order didn’t arrive in a timely manner, that reflects on you alone in your customer’s eyes.

Because of a few minor issues with the company we were using to supply our blank t-shirts – namely incomplete orders, out-of-stock items that were listed as in-stock at the time of order, and high shipping costs – we decided to place our last order through a different website – jiffyshirts.com.

At first glance, the website looks…simple.  It’s not flashy.  It’s not distracting.  It’s exactly what it should be – an easily navigated site for blank shirts (among other items like hats, towels, tote bags, shorts, hoodies, etc).  There are no links to other sites or paid ads, and I dig it.

In the middle of the home page is a shipping timetable calculator that displays the amount of time left to order to receive your shipment by a certain date.  Very handy feature.  There are navigation buttons to narrow down what you’re looking for by style, brand, material, color, collar…you name it.  These filters are very helpful, especially considering the wide range of products they offer.

Once you select a specific item and click on it, you’re taken to a page that lists the details of the item (material, weight, available sizes and colors, as well as other features).  There is also an up-to-date inventory counter displaying the exact number of each color and size available.  The shopping cart and checkout procedure is a breeze, and they even accept PayPal which is wonderful as most of our customers make their down payments through PayPal and it eliminates the need to withdraw the money, which saves us time.

Okay, so the website’s nifty.  Big deal.  Can they actually deliver a good product quickly?

You bet!

First off, for comparison sake, I can tell you that the shirts from jiffyshirts.com were 17 cents less than the same shirts from our other supplier.  Oh, and did I mention *Free Shipping* on orders over $65?  Our 102 shirt order ended up being $40 cheaper than it would have been from the other guys, AND it was delivered not only complete but in half the time.

It would be an understatement to say that I’m impressed with jiffyshirts.com.  Since I’m not the under-stating type, I’ll skip it and just say that we’ve definitely found ourselves a new shirt supplier.

Forty-Two?! Really?!

Posted: April 9, 2011 in On A Personal Note

I’ve mentioned before that being a small business owner can be overwhelming because of all the hats you’re forced to wear.  When you don’t have a workforce that reports to you, it’s difficult (nay, impossible) to delegate responsibilities.  If it needs to be done, you’re going to be the one doing it.  Unfortunately – and I’m sure there are many people who will agree with me here – I don’t know everything about everything.

Case in point, shipping.

Today, I mailed out a 40 shirt order to our friends at Bent Wookee Comix in Johnstown, PA.  The box was 22” by 17” by 9” and weighed just under 20 pounds.


A majority of our orders are smaller – one or two shirts at a time – and shipping is only slightly more costly than mailing a letter.  Additionally, our larger orders tend to come from local customers, and are either picked up or delivered in person.  Consequently, I don’t have a lot of experience with shipping through UPS or Fedex.

After the package was packed up, taped, and labeled, I took it to the local Pony Express – a strip mall place that handles UPS and Fedex shipping, as well as other services.  The absolute cheapest shipping method available was Fedex Ground at $41.92.


$41.92!!


Forty-one dollars and 92/100————-


What.


The.


Hell?!


Is it just me, or is that ridiculous?


I think I now understand the feeling that I’ve heard women mention when they talk about going to a mechanic.  I feel like I’m getting ripped off, and I don’t know what other options I have.

As soon as I’m finished complaining here, I’m going to research how to get better shipping prices but, I’m wondering…does anyone have any suggestions?


$41.92, indeed!


My, what a productive day!  We completed one full order and finished the art and prep work for another job.

The time between placing an order for blank shirts and the delivery of the shirts a few days later is my favorite.  It’s “go time.”  It’s the last chance you have to get everything ready so the first shirt can be off the press 10 minutes after the UPS guy drives away.  It’s finalizing artwork, coating screens, pre-selecting or mixing inks.  I always feel like the A-Team during that montage 37 minutes into each episode, when they’re preparing to pull off their elaborate plan.  It’s exhilarating – grace under pressure in the face of a pending deadline.  Loves it.

We did a quick run today of 40 shirts, and I’m expecting another 100 to arrive tomorrow.  There will be a blog about that order coming soon, but I will say that this new run is going to require a printing technique that we’ve never tried.  We know how to do Blend Printing in theory – we even tried it at the Ryonet location in Los Angeles – but we’ve never setup a whole run for it.

This is why I mentioned “go time.”  There are 100 shirts literally on the way to The Lab, and we need to be ready when they get here.

Today, before digging into any production printing, we did a little experimenting with blending inks through a single screen.  This is a process for obtaining color fades.  In other words, you put red on one side, yellow on the other, and when the print is done you should end up with a red-to-yellow fade that has created shades of orange in the middle.  For demonstration purposes here’s a video from our friend and fellow screenprinter, Jeanette from The Pondering Pooch, showing how to do a natural blend effect.

Using a screen we had on hand, we attempted to make a rainbow effect using only four colors – red, yellow, blue, and purple.  In theory, the red and yellow will combine to make orange, the yellow and blue will make green, and the blue and purple will create the indigo/violet color, essentially creating a seven-color image out of only four colors.

Well, guess what.  It totally works.  The only mistake was that I loaded the ink into the screen in reverse order, so instead of ROYGBIV, we ended up with VIBGYOR.  This is why experimenting is a good idea…

Since we began screenprinting, we’ve met some really awesome and incredibly talented people.  These people are wonderful sources of information and experience, and I can’t express how helpful they’ve all been.  It’s an amazing benefit to have a group of people to answer questions and share results, and I want to take a moment to thank Nicole Grobaski from NG Ink and Jeanette Foss from The Pondering Pooch for their advice and expertise on blend printing and everything else.  Thank you, Ladies!